Category Archives: Travel

Foraging

So the other weekend we took a walk on the wild side! We went on a foraging and cookery workshop with Floramedica medical herbalist Anna Canning and the chefs of Spoon at Arthur’s Seat in Edinburgh. Anna told us that all of the plants belong to the queen, but she doesn’t mind if we only swipe a few leaves, so lay off, beefeaters!

Anna was excellent- incredibly knowledgeable about plant edibility and nutrition, medical properties and folklore. She also knew all the pitfalls of foraging and made sure no one accidentally poisoned themselves. Among our foraged foods were nettles, rosebay willow herb, sticky willy, wild garlic mustard or jack-by-the-hedge which was our favourite because it tastes like garlic!, chickweed, daisies, and elderflower. Anna also let us sample a selection of her herbal teas. She was our herbal sherpa.
Foraging

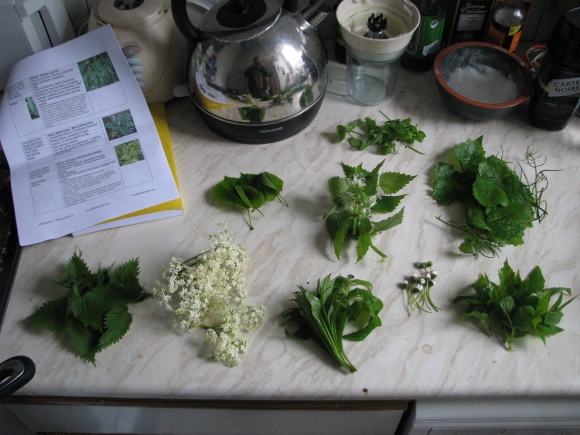
From left: Nettles, elderflower, rosebay willow herb, daisies, ground elder; (next row up from left) lime tree leaves, birch leaves, garlic mustard; (at the top) chickweed

Afterwards we went to Spoon with all the plants we had gathered and the chefs at Spoon cooked us something like seven different dishes, right in the kitchen! We had- two different dips with rosebay willow herb and wild garlic mustard with veggie dippers, nettle soup, haddock patties with (I think) sticky willy, some squirrel stew with assorted herbs, pearl barley risotto, a wild herb and daisy salad, with elderflower pannacotta to finish, as well as three or four herbal teas. Head chef Rory even broke out some home-made elderflower wine for us to taste! It was such a great experience seeing the chefs work right in front of us, and the staff at Spoon have an intuitive knowledge of what taste combinations were going to work- they had to improvise a bit (it’s the nature of cooking with foraged food), and everything tasted delicious! The most important lesson was that it is really easy to integrate foraged food into dishes you are already comfortable with, and often the best recipes are the simplest ones!

Haddock Patty

Haddock Patty

Squirrel Stew

Squirrel Stew with Foraged Herbs

Pearl Barley Risotto

Pearl Barley Risotto

Elderflower Pannacotta

Elderflower Pannacotta

We were so inspired after we left that, as soon as we had finished digesting our huge lunch, we had to start cooking again! We made two pestos- a stinging nettle pesto, and a garlic mustard pesto (with a bit of chickweed and rosebay willow herb).  We decided to pesto-ise as we had picked a whole bunch of stuff and wanted to make something before we went on holiday.  We also picked a bunch of elderflower and made elderflower cordial which we will show you how to make.  But first:

Some tips on foraging:
Wear hardy waterproof shoes and bring a raincoat if you live in this country as it will always rain.
Dont pick plants that are near roads or that dogs might have weed on.
Bring a hessian or cotton bag for gathering herbs.  Some seperate plastic bags are good for seperating plants and also for storing herbs that you don’t want to mix (like nettles that will sting you) For plants like nettles bring some gloves or a plastic bag to help you pick them- a pair of scissors is also handy.
Do not uproot plants- usually the top few leaves of spring growths are best- but this can vary.
Go with someone who knows what they are doing, but if you go on your own make ure you bring a couple of books for cross referencing.  usually one with pictures and one with photos is best as the same plant can often look different.

For the stinging nettle pesto:
Nettles are pretty awesome.  Their stings are good for you-they get the blood flowing! Roman soldiers actually bought them to the British Isles, and used to hit their aching muscles with them after long marches in the cold to make sure they were still alive and increase circulation.  They are also the loveliest green colour- so lovely that in the second world war the british government requested 100 tonnes of nettles to be collected to use their dye for camouflage.  So if your greens need greening- just pick some nettles!

Nettles can be found during most of the year- Feb to Nov but the first spring growth is always best.  The top few leaves are usually the best, but don’t pick them if they have started flowering (wiggly stringy green bits).  Shady ones are also usually less bitter.

What you need:
A large bunch of nettles -4 or 5 cups worth
Grated parmesan cheese- a tbsp or two
A clove of garlic minced
200g Pine nuts- (or other nuts like walnuts)
a drizzle of lemon juice
About 1/4  cup of olive oil
salt and peps

Stinging Nettle Pesto

Stinging Nettle Pesto

So first carefully pick the leaves and put them into a pot of boiling water  for a few minutes so they don’t sting your mouth.  Drain- but keep the water to make yourself a hot cup of nettle tea while you continue pesto-ing.  Run drained leaves under cold water so they keep their colour.  Spin the leaves in a salad spinner or colander, then wrap in a paper towel to squeeze the excess moisture out.  Lightly toast the pine nuts in a pan till golden.  Toss everything into a blender with a tbsp of the olive oil and blend.  Check the consistency and taste- drizzle in more oil/ lemon/parmesan if needed to taste.

For the wild garlic mustard pesto:
For the wild garlic mustard pesto the recipe was quite similar although we used some rosebay willow herb, chickweed, and sticky willy to add some complexity to the flavour.  If you only have a few leaves just make a little pesto! You don’t need loads.  It’s so easy and delicious! You can vary the consistency for a drier chunkier pesto, or a smooth oily one.  It keeps in the fridge pretty well, and lasts longer if you remember to top it up with  a dash of olive oil.  Tastes great on toast or in your sandwich, as a soup topper, salad dressing, on pasta, in pasta dough, or on a lovely chunk of meat/fish.

Garlic Mustard Pesto

Garlic Mustard Pesto Ingredients

For the elderflower cordial:

8 heads of elderflower
An orange
3 Tbsp Lemon juice
100ml water
500g sugar
A large bowl, strainer, tea towel, and bottle

Elderflower Cordial Raw Ingredients

Elderflower Cordial Raw Ingredients

Boil the water and add the sugar.  Stir to dissolve- and when ready take off the heat and allow it to cool slightly.  Zest orange peel into the mixture, and chop orange into slices. Place elderflower heads in a bowl ( make sure there are no insects on them).Pour over orangey sugar water, lemon juice, and the orange slices.  Make sure as many of the flowerheads are covered with water as possible.  Cover with a tea towel and leave for 48 hours- stirring occasionally.  Strain mixture and place in a bottle. I used a lovely old whisky bottle that I thought I would never use (it pays to keep things you don’t need!) You can discard the strained out stuff although the orange slices taste yummy.

Enjoy this cordial diluted with water, soda, gin, or anything your heart desires!  Nice with a slice of lemon or a sprig of mint or tiny weeny eledrflowers floating in your drink.You can also heat a little bit up and use it to drizzle over desserts.

Notes: you can eat the flowers but don’t eat the green bits.  They’re bad for your kidneys.  An easy way to get lots of flowers off the heads if you need them is using your fingers or a fork to comb through.

Tagged , , , , , , , , , , , , , ,

Diots de Savoie and wild mushrooms in the French Alps

The Alps

The Alps near Annecy. If I looked this good half the time, I mean, jeez.

So last week we were in La Clusaz in  the French Alps for our spring vacation.  Its usually a ski resort but this time of year the scenery is really beautiful especially down near Lake Annecy where we spent much of our time.  This part of the world is known for lots of delicious foods- raclette, fondue, tartiflette to name but a few.  Cheesy and heavy these are often fed to skiers after a long day out on the slopes or to spring time tourists who like cheese 🙂  Speaking of which, there are also lots of delicious cheeses like reblechon- tres creamy, tomme de savoie ( and other tommes)- semi soft, and abondance-  a 2 year old hard cheese to name a few local ones which are all awesome. Although \i have to say this is the probably the first time in my life I feel slightly cheesed out. We ate out a lot, but on the few nights we were in we decided to try some local cooking at home in the Chalet Le Grizzly where we were staying.

Diots de Savoie au vin blanc, et champignons sauvages sur du pain grillé
or in anglaise Sausages in white wine and wild mushrooms on toast

Diots are a delicious french  meaty sausage lightly flavoured with nutmeg that can be consumed raw- often with mustard, or cooked.  When cooked, they are traditionally simmered in a white wine and onion sauce, and often served with creamy cheesy garlicy crozets which are teeny tiny square pastas.  We used the basis of the traditional recipe for the sauce but added some extra vegetables to the mix in an effort to be healthy. This recipe is happy to be cooked in a single large pot so its nice and easy.  The first time we made this we also had some wild mushrooms from the local markets on toast but sadly we have no pictures of these because we forgot and ate them up too quickly.  But the diots were so delicious we made them again for family so we had 10 sausages, and this time we took photos.  We’re going to provide the diot recipe for two (and the mushrooms sans photos), so don’t get too confused if you follow it and your pot doesn’t look like it has 10 sausages like the pictures. Here’s how its done:

Diots de Savoie -Serves two

Ingredients:

Four Diots de Savoie from your friendly french butcher.  We reckon yorkshire sausages or the like could also work.

One Tbsp Flour

One Tbsp Butter and one Tbsp olive oil for frying

One large white onion

Two large garlic cloves

Two large handfuls of small new potatoes

10-12 Asparaguses

500 ml Chicken stock

250 ml  Dry white wine such as Apremont

Pepper (no salt as the sausages are salty)

Herbs de Provence

Crusty baguette for mopping up sauce

One large pot

Wine: Usually served with white wine. We can definitely recommend the local Savoie Apremont Sec- quite light and dry and a good accompinament to a heavy meal.  Or if you fancy the red a bottle of Arbin which is also a nice local wine – quite full bodied and pleasantly peppery.

Method:

Chop your garlic into small pieces, and cut your onion in half and slice into thin half moons. In your large pot melt the butter and oil.  Once foamy, lightly sauté the onion and garlic.

Half-moon onions

Don’t make the mistake of cutting the onions as per the anchovy pasta, aka. The ONLY Correct Way To Chop An Onion. It is not the only correct way.

Big Garlic

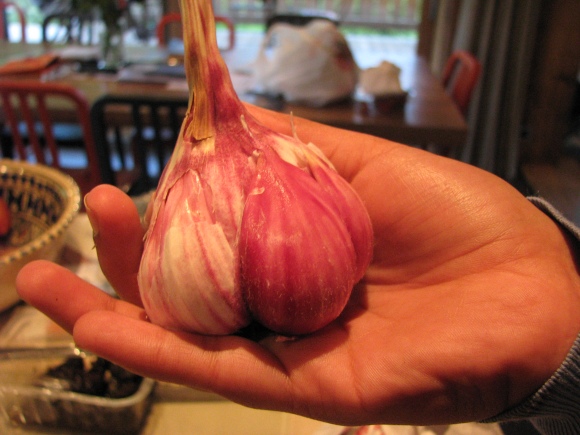
I can’t believe how goddamn big the garlic is in France.

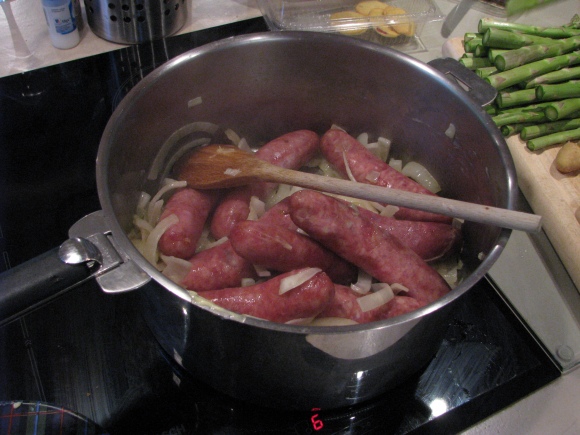
Add the diots whole and cook until golden brown.

Diots Cooking

Apparently you can just eat these things raw. Not for us.

Sprinkle with flour to make a bit of a roux and stir.

Roux

Roux is so French I want to kiss it with tongues.

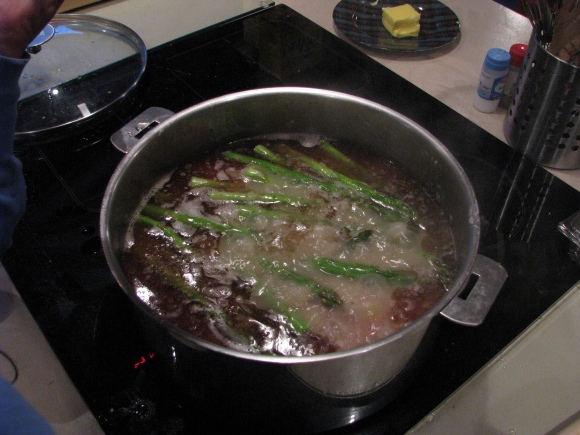
Add the white wine, stock ,pepper, herbs de provence, and new potatoes (If the potatoes are not very small cut in half first). Cook over low heat for about 30 mins (lid off). The jucy salty oils from the sausages should meld into your sauce, and it should gradually thicken.  Add the asparagus and cook for a further 15 mins.

Stewing

Stewing away.

Scoop out into shallow bowls. Eat!

Serving Diots

Make sure none of the sauce spills. Wipe the counter with a baguette if this happens.

Tips: If your sauce doesn’t thicken like you want it to, add a little sauce to a bowl and gradually stir in some more flour.  Once incorporated slowly add to the pot.  Also, if you have any of the sauce left over you can add some more veg to it and make it into a soup!

For the wild mushrooms (morels and girolles) on toast:

This recipe is super simple but really really delicious.  Its a great way to prepare any kind of flavoursome mushroom.

Ingredients:

1 Tbsp Butter

2 garlic cloves

Salt and peps

250g morels sliced thickly

250g girolles whole

crusty baguette

Melt the butter.  Once foamy add the garlic and saute for a few minutes.  Add the mushrooms, sprinkle with a little salt and pepper and saute till soft.  In the meanwhile toast slices of your baguette in the toaster or oven.  Pour the buttery mushrooms all over the toast. Enjoy!

Tagged , , , , , , , , , , ,

Stoodley Pike Tapas Birthday Extravaganza!

Our very first blog entry commemorates Rasha’s 26th birthday. We decided to go on an 11 mile hike and thought a lovely spanish picnic would make all the exercise go down easier. The spanish tapas recipes come from The Book of Tapas by Simone and Ines Ortega.

Eating tapas on Stoodley Pike

Yumzo!

Ham Croquettes (Croquetas de Jamon de York)

Serves 8

Ingredients:

2 tbsp sunflour oil

40g butter

4 tbsp all-purpose flour

750ml milk

2 eggs

175g bread crumbs

vegetable-oil for deep frying

salt

fresh or fried parsley

200g Yorkshire ham, very finely chopped

Preparation:

When I was making the bechamel sauce, I consulted The Cook’s Book. It turns out there are two different kinds of bechamel sauce, one which takes a lot longer than the other. The first involves heating the milk with some aromatics to add some extra flavours before adding the milk to the rest of the sauce. The type I made was the shorter version, as suggested by the Ortegas. Heat the oil and then add the butter. The oil prevents the butter from burning too quickly. When the butter is melted, stir in the flour with a wooden spoon. Gradually stir in the milk and keep stirring until the sauce thickens. We added a bay leaf to the milk while stirring the sauce. Once all the milk has been added to the pan, it should take about 10 minutes for the sauce to thicken to heavier bechamel.

You can either use serrano ham or Yorkshire ham, but I thought I would go local and choose the Yorkshire ham. Stir the ham into the bechamel sauce and season to taste with salt and pepper. It’s better to do the seasoning after the ham is added than to season the sauce by itself so the mixture doesn’t get too salty.

Pour the mixture into a large baking dish. We had about 2cm of mixture in the bottom of our dish. Cover it with cling-film and pop it in the fridge for at least 2 hours for it to set.

Croquette mix

Croquette mix- tastes much better than it looks

Set up your workspace while you are waiting for the mixture to cool. You will need a shallow dish with the beaten eggs in it, and another to put the bread crumbs in. Take out the cool mixture, and using two tablespoons, begin shaping the croquette mixture into quenelles.

Croquette quenelle

Making the quenelles of sauce for the croquettes- remember- use spoons!

As you make each quenelle, scoop it up into your hand and roll it in the breadcrumbs. Try and make sure the bread crumbs cover the entire surface, which make it easier to handle.  Then roll the croquettes in the beaten eggs, and then again in the bread crumbs. The pointed shape of the quennelle will naturally soften into a barrel shape. You can finish off the barrel shape with your fingers.

Bread crummin'

Bread crummin'

Some tips:

Try to clean off your fingers periodically through the process so the croquettes don’t get messy in your hands while rolling them.

Don’t start off with all the bread crumbs in the bread crumb dish, or the will start to get lumpy as you work. Top it up periodically so you don’t end up with a soggy lump of breadcrumbs.

Have a plate ready to put the croquettes on. It takes some patience and practice, but soon they will start to look like legible shapes.

Croquettes- pre-fry

Croquettes- pre-fry

And then the frying. Heat the vegetable oil to about 180-190 degrees C, or until a piece of white bread browns in 30 seconds. Watch out for spitting oil, and add the croquettes into the oil in batches off about 6 at a time. Cook them until the outside is brown and crispy. Transfer them to a plate covered with paper towels to soak up any excess oil, and put the plate into a warm oven while you cook the rest of the croquettes.

Before each batch, do the bread cube test to make sure the oil is still at the right temperature. You can serve immediately and garnish with fresh or fried parsley, but we let ours cool,, put them in tupperwares and had them the next day for lunch. They were yummy.

Spicy Chorizo and Gherkin Pinchos (Pinchos de Chorizo Picante y Pepinillo)

The pinchos are an endurance trial. The anchovies and onions are slippery, and the toothpicks start to dull after the 3rd ingredient. But the  flavour combination was something unusual that we wanted to try, so we persisted and made about 20 of them.

Ingredients

Deli-counter anchovy fillets (they crumble less easy than canned and are much less salty)

175g sliced spicy chorizo (the Ortegas say to remove the casing, but we found this to turn into a smushy mess, so left them on)

about 20 cornichons (you can use any kind of pickled gherkin, but cornichons are easier and cuter)

about 20 pickled onions (the smaller the better)

1 fresh red chilli, seeded and cut into slices (we used green)

about 20 cocktail sticks.

The method here is quite self-evident, see below, just remember to roll the anchovies!

Banderillas

Pinchos- they look like scarecrows

Spanish Tortilla (Tortilla de Patatas a la Espanola)

Ingredients

500 ml olive oil for frying

750g potatoes, halved lengthwise and thinly sliced (so you get half-moon shapes)

1 large onion, roughly chopped

100g gruyere cheese

6 eggs

1 cup roughly chopped spinach

2 tbsp olive oil

As this was a birthday meal, we opted for the classic fried Spanish tortilla. In this recipe, you pan fry the onions and potatoes, rather than a healthier method, so you may want to look around for something healthier if you aren’t interested in flavour. Ours is a variation on the Ortegas’ recipe, though they fry theirs too.

First, heat the 500 ml of olive oil in a large frying pan over medium heat. Add the potato slices and onion, and stir until softened and golden brown. Tip: If all the potato and onion mixture does not fit into your frying pan, do it in batches. Season with salt and drain on paper towels to absorb excess oil.

Beat the eggs with a pinch of salt in a large bowl. Add the potato and onions to the eggs, and then add the cheese and spinach and stir with a fork. Heat the 2 tbsp olive oil in the skillet, and then add the mixture. Do NOT Stir! Cook until the bottom is set and lightly brown. Then flip it over. It may seem cruel for me to glibly suggest you just flip over this hot heavy tortilla like it was a playing card, but that is what you have to do, and if you break it, shame will follow you for the rest of your days. The method for this is to put a plate over the frying pan. If the plate is smaller than the circumference of the pan, it will slip inside and you will burn your fingers. If the plate is larger, the plate will probably slip as you flip, and shatter into a thousand pieces. Needless to say, it is a difficult and frustrating thing to try to do. If you can achieve this subtle art of the flipped tortilla, you then slide it from the plate back onto the frying pan and cook it until the other side is golden brown. Then you can slide it back onto the plate and serve like a pie or omelette.

You can put pretty much what ever you want into a tortilla. We added the spinach and cheese, which was excellent. They also travel well.

Tortilla

Tortilla- Why do half of people think that a tortilla is a wrap and the other half think a tortilla is a potato omelette? To be clear, this is the potato kind.

Olive caviar (Caviar de Aceitunas)

Easy and delicious.

Ingredients

150g black olives (pitted, to save yourself the effort of pitting them yourself, unlike me)

4 canned anchovy fillets in oil (not 4 cans, 4 fillets) drained

1 1/2 tablespoons capers, rinsed

2 tablespoons olive oil

oaties or crusty bread (Nairns, obv.)

Method:

Blend the olives, anchovies and capers in a blender until grainy like caviar (you can do this in two batches). Stir in the olive oil. Spread on the oaties and jam it in your mouth. You won’t be able to stop.

Tapas

Up at Stoodley Pike Monument. After being hailed on for approx. 1 hour, food was welcome.

So that is our first post. Thanks to Kate, Jo, and Sama for coming up to Yorkshire for Rasha’s birthday! Stay tuned for more!

Tagged , , , , , , , , , , , ,